Synchronize data using Intelligent Cloud
All customers with on-premises installations of Business Central can easily connect their solutions to the intelligent cloud. Each on-premises solution that connects to the intelligent cloud will be able to replicate data from on-premises to the cloud tenant.
There are a few key points that need to be understood before proceeding with the setup:
- It is always a best practice to test this configuration in your Sandbox environment before making changes to a production tenant.
- Any existing data in your Business Central tenant will be overwritten with data from your on-premises solution, or source, once the data replication process is run
- All users that do not have SUPER permissions will be automatically reassigned to the intelligent cloud user group. This will limit them to read-only access within the Business Central tenant.
- If your data source is Business Central (on-premises), several stored procedures will be added to the SQL server you define. These stored procedures are required to replicate data from your SQL server to your Business Central tenant.
- In the current version of Business Central, the amount of data that can be replicated for any tenant is limited to 150GB. If your database is larger than 150GB, try reducing the number of companies you are replicating data for. This can be done using the company selection within the Wizard. Additional options for databases exceeding 150GB will be available in future updates.
- Before setting up your intelligent cloud environment, ensure that at least one user in the system that has ‘SUPER’ permissions. This is the only user that will be allowed to make changes in the Business Central tenant.
- Configuring the intelligent cloud environment will have no impact on any users or data in your on-premises solution.
- To connect to the intelligent cloud through Business Central, the on-premises solution must use SQL Server 2016 or a later version, and the database must have compatibility level 130 or higher. The on-premises solution must also be one of the supported versions.
Intelligent Cloud Setup
1. In a web browser, log in to your Microsoft Dynamics 365 Business Central.
2. Install the standard Business Central Intelligent Cloud extension.
Note: This extension should be available in the Extension Management by default.


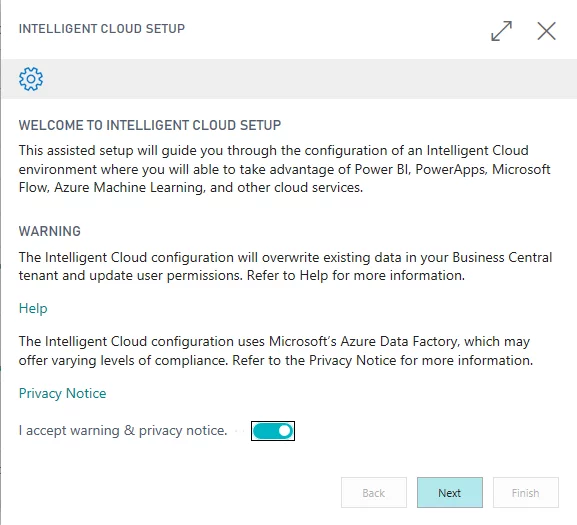
4. In the Intelligent Cloud Setup window, accept the terms, and then select next.
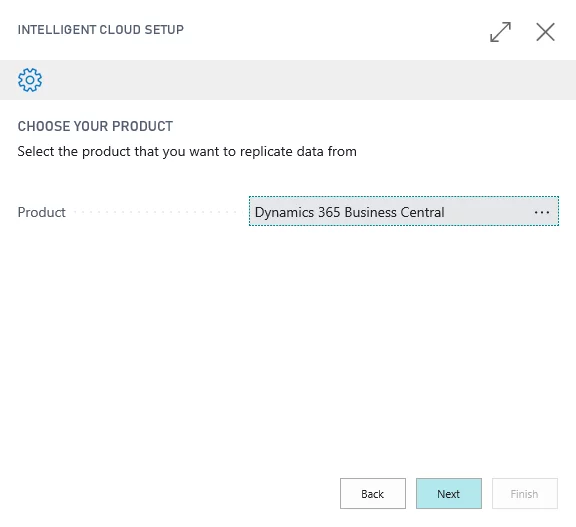
5. On this page, specify the on-premises solution that you want to replicate data from. All supported sources will appear in the list. If you don’t see your product, navigate to the Manage Extensions page, and then verify that the intelligent cloud extension for your on-premises solution is installed.
6. If the product you selected requires a SQL connection, this page will be presented. Other source applications may require different information to connect to them. This page will display the connection information based on the product that you specified on the previous page.
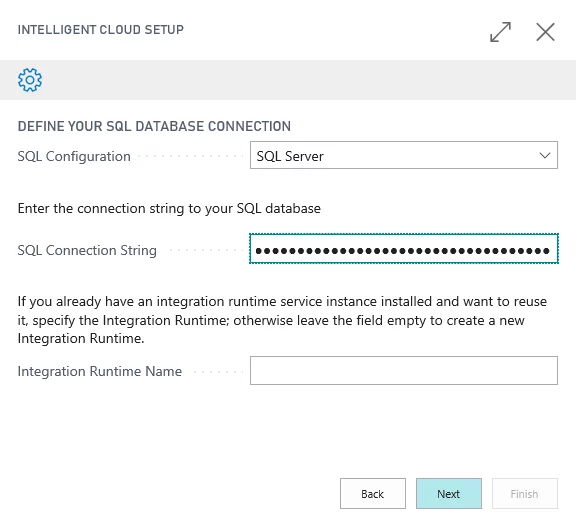
- SQL Configuration: SQL Server.
- SQL Connection String:
Your connection string should look as follows:
Server=tcp:{ServerName},1433;Initial Catalog={DatabaseName}; User ID={UserName};Password={Password};
Example:
Server=tcp:PC-OSHK\SQL2017,1433;Initial
Catalog=Demo Database D365BC 24623 BE; User
ID=sa;Password=123;
- Integration Runtime Name: If your SQL connection is SQL Server, you must specify the runtime service that will be used to replicate the data from the defined source to your Business Central cloud tenant. To create a new runtime service, leave the field empty, and then select Next.
7. In the instructions phase, you are given a link to download the Self Hosted Integration Runtime installation file. The next section will run through that.

Leave this open
as you will need an Authentication Key
in your installation.
Intergation Runtime Installation
This is a service that will allow access to your on-premises SQL database during the replication process. Follow the instructions on this page to install the Self-Hosted Integration Service (SHIR) to a local machine.
8. Download the Self Hosted Integration Runtime (SHIR) at the following link: https://www.microsoft.com/en-us/download/details.aspx?id=39717
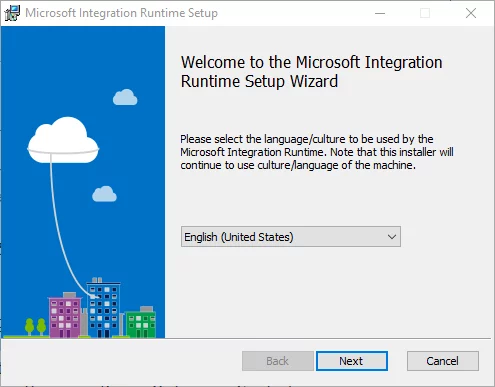
9. Run the Integration Runtime installation file.
10. Choose your installation language:
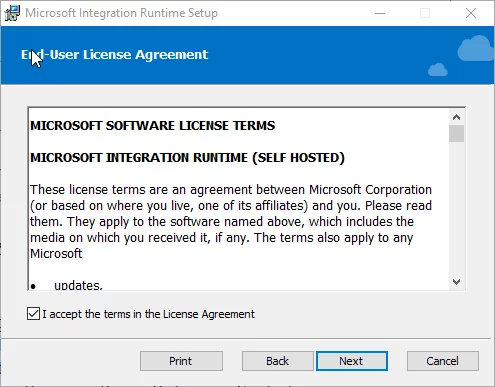
11. Accept
the License Agreement:
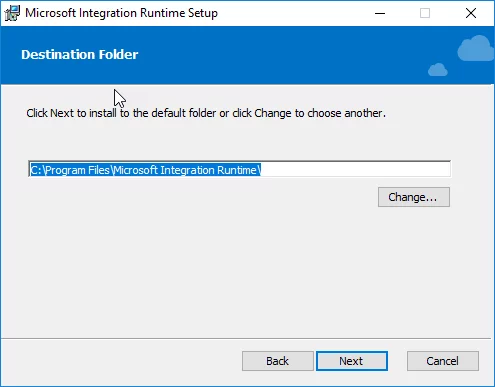
12. Select a folder to install the Microsoft Integration Runtime to, and then select Next.
13. Select Install to start the installation process.

14. Copy your Authentication Key (generated on step 7) from the browser setup and past it in the provided field. Pasting it should result in a check mark.
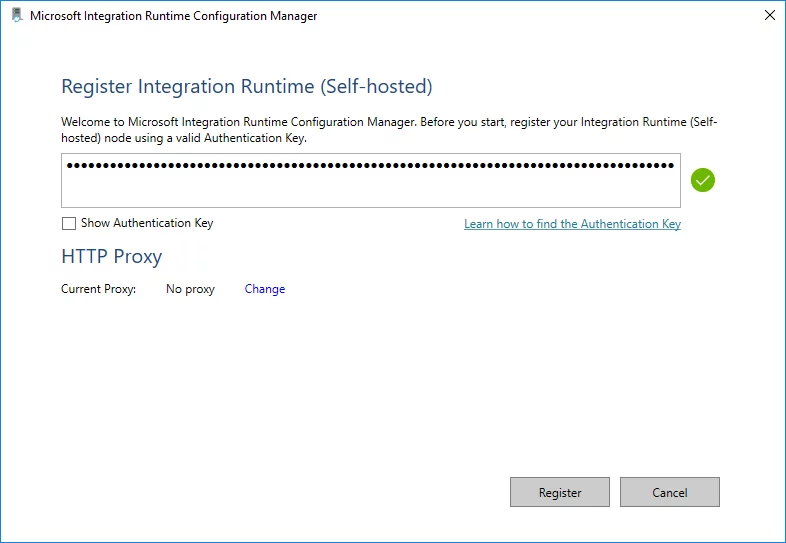
Select Register after the Authentication Key was verified.
15. Next up you have the option to rename the node name if it is needed. You can have up to 4 nodes connected to 1 runtime service.
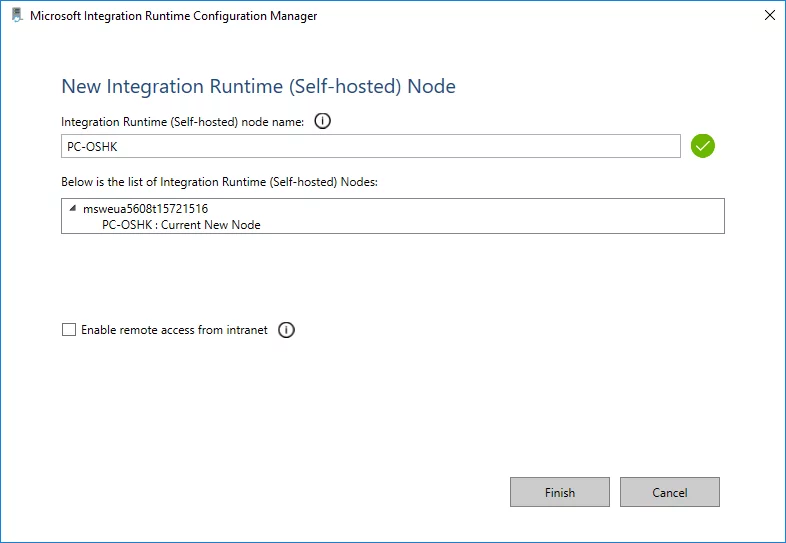
Select Finish
to finalize Integration Runtime
registration.
16. On the next page, you can check the result of
the registration process.

Select Launch Configuration Manager in case the Integration Runtime node was registered successfully.
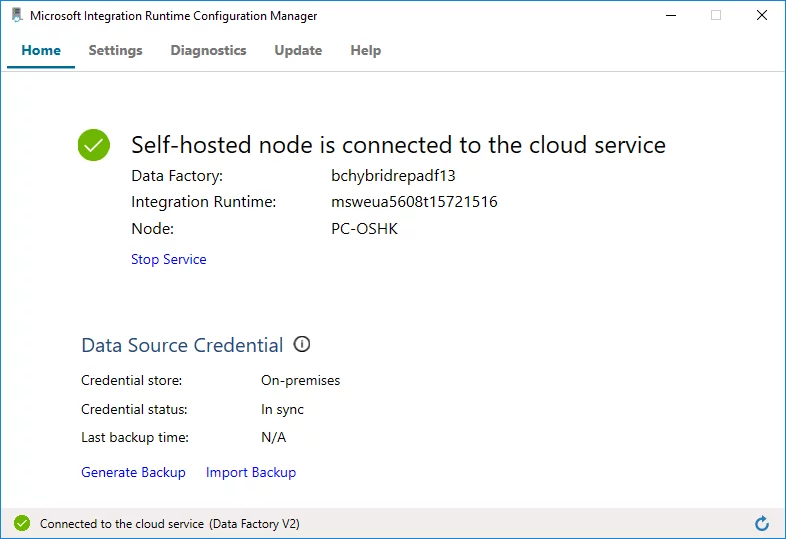
17. On the following page you can check the Self-hosted node connection status.
18. At this point, you need to return to your browser and select Next on the instructions phase to continue.
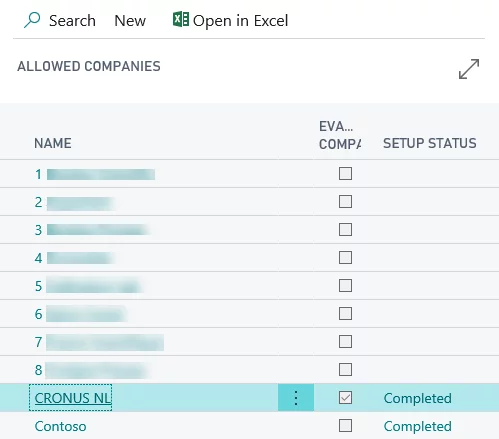
19. You will be provided with a list of companies from your on-premises solution.
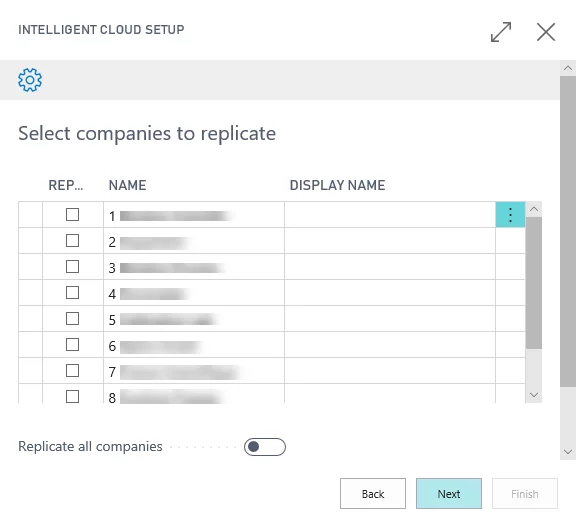
Select the companies you would like to replicate data for, and then select Next.
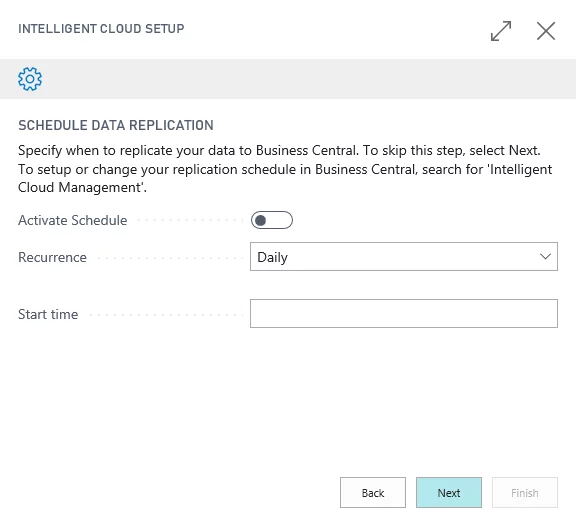
20. The final page in the wizard allows you to enable the replication process and create a schedule when data replication should occur. These settings are also available within your Business Central tenant on the Intelligent Cloud Management page. You have the option to schedule replication daily or weekly. Microsoft recommend that you schedule your data replication for off-peak business hours.
In this example, we don’t need to activate a schedule yet since we would like to run the replication manually.
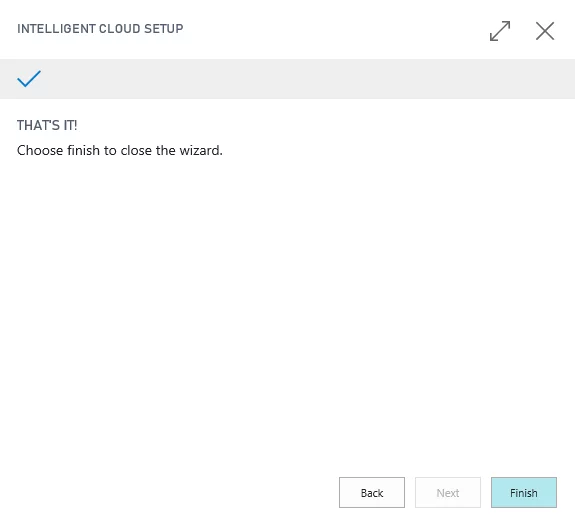
21. That’s it! Select Finish to finalize your Intelligent Cloud configuration.
Managing Replication
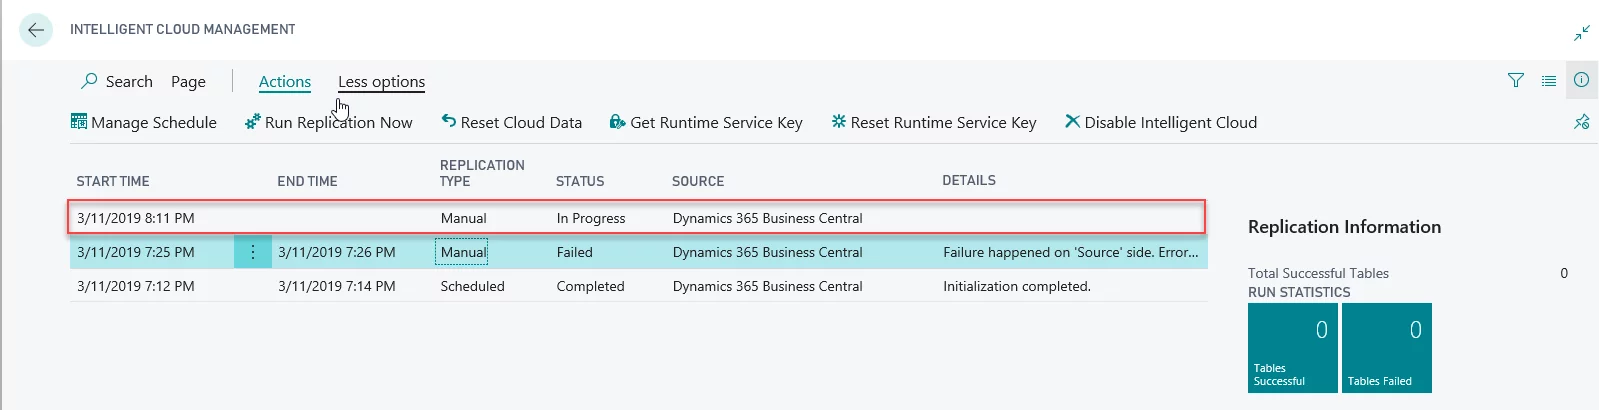
Search for Intelligent Cloud Management in your MSDYN365BC.
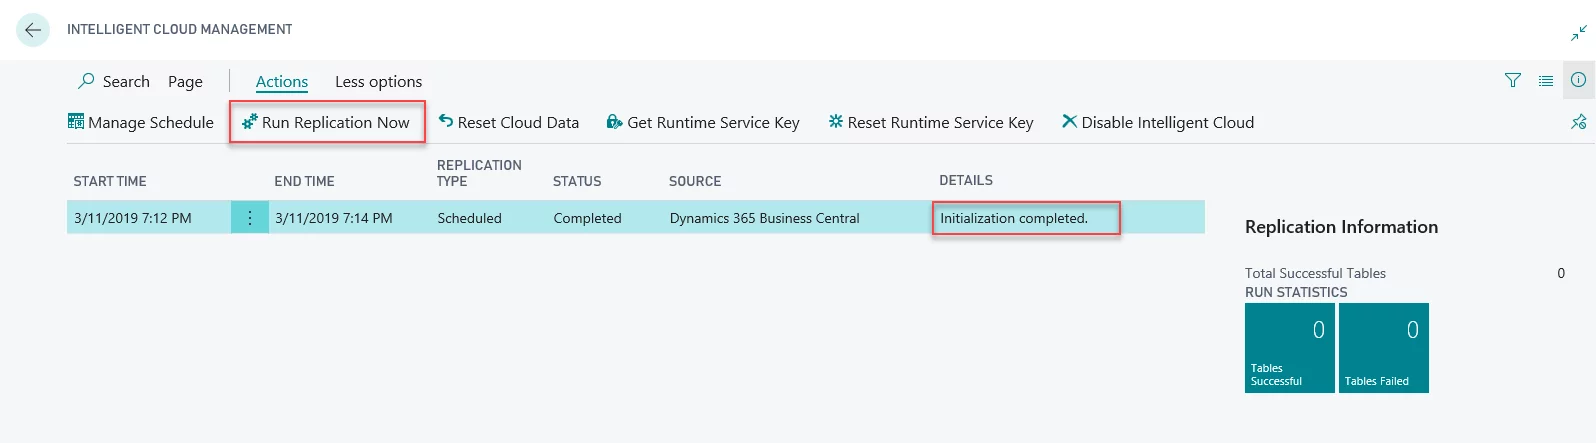
Select Run Replication Now to start the synchronization process.
Once the connection has been established, the desired on-premises data can be securely replicated to the intelligent cloud and you can essentially create a hybrid deployment, which gives you flexibility and easy access to the cloud with the security of an on-premises server.
Intelligent Cloud Sync as a data Migration Mechanism
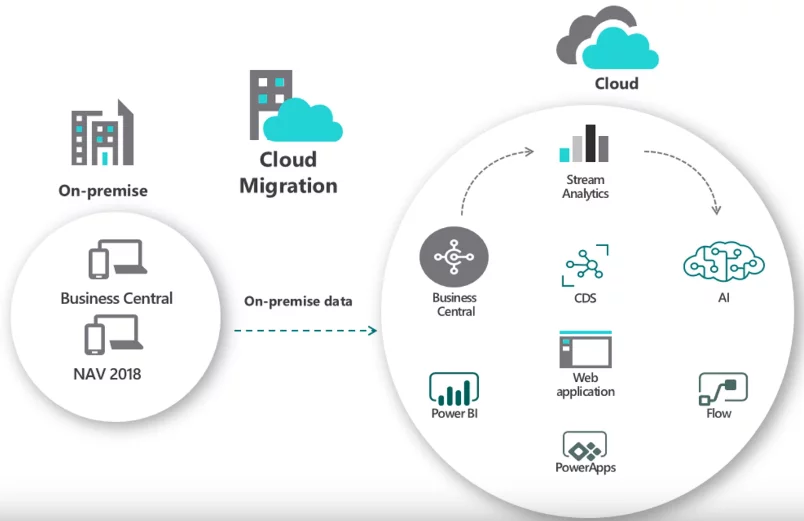
As you know, the intelligent cloud
sync was originally introduced as a mechanism to allow on-premise users of MSDYN365BC
to benefit from the intelligent cloud insights, which are the pinnacle of the on-premises
implementation, by providing them with a companion database in the cloud. This
approach allows you leverage the new cloud technology to the full. At this
moment, the intelligent cloud is also one of the possible workarounds for data
migration from on premise to SaaS, however, data migration is not the primary
idea behind the intelligent cloud sync.